There are many approaches and applications you might use to create videos. To help you avoid feeling overwhelmed by all the best practices for video production, here are some general tips that will likely apply to many video production projects.
Before you start
Before you start, talk to the Nerd Bytes team and see if your video content relates to something they've already worked on, or plan on working on.
Some tips on production value
Some thoughts on production value and how long we take on these projects:
- Be okay with some imperfection. We are not video production professionals and we don't believe anyone expects us to be. A very quickly and roughly made video can still show how to use the UI and still benefit people even without high production value.
- Another reason we are okay with some lower production quality: we know that most of our videos will go out-of-date sometime in future, sometimes in very near future. For this reason, we see it as better to err on side of getting helpful videos out quickly as opposed to spending a lot of time on videos that we know we'll have to replace.
- Don't let your quest for perfection be at odds with getting out a highly useful video on quicker side.
To take some common examples of imperfection that can bother video-makers but that aren't usually that big a deal:
- A quickly written and produced video can be completely fine, provided you think it will add obvious value.
- Some rough spots in your voice-over (uhs, umms, pauses) are okay.
- Some background audio hiss or noise can be okay, if not too bad.
- Some rough/imperfect cuts between clips (for example, a cut where a cursor suddenly jumps somewhere else) can be okay.
Script writing tips
Some tips for writing your script:
- Consider talking first to SMEs who know about that UI. Consider talking to UX designers who may know about best practices for a specific UI or about upcoming changes that might make your video out-of-date in the near future.
- Try to keep your video under two minutes. If your script is longer than that, consider breaking it up into more than one script.
- You can estimate your video length by doing a leisurely read-through of your script.
- You don't have to read your script verbatim. It's okay to do a relaxed, casual, non-scripted narration, if you feel comfortable doing that. Or, do a loose read-through of your script, where you read some of it but then digress as feels natural.
Tips for recording
When it comes to recording your video, there are two main approaches you might take:
- Record your screen capture at the same time as you read your script. This will generally be easier, because you don't have to do two recordings and edit them together. But it can also be a challenge because it requires you to read and do the on-screen actions. If you go this route, place a second computer display with your script on it directly beside the computer display you'll be recording on.
- Record the audio and video separately. This would mean recording your screen capture and then, after that's done, recording an audio track while you watch the video play.
Tips for using Camtasia to record your screen capture and voice-over audio:
- Record in a quiet room, using some sort of external microphone (for example, Apple headphones). Don't use the built-in computer microphone.
- To record: in Camtasia, go to File > New recording. For video, you can use the Full screen option to record your entire screen. If recording audio, ensure the audio input is set correctly. To test that everything is working, record a minute or so and then review it to make sure everything looks okay.
- If you're recording a single browser window, it's a good practice to make it full-screen.
- When recording audio: at the start of your recording, record a few seconds of room tone (the sound of the empty room). This can then be used to fill in gaps or cover up noises in the audio. Using room tone is better than using pure silence, because cutting from your audio to pure silence can be jarring.
- If you're recording audio and video, note that it's easy to take out pauses in the editing phase. This means when recording, you can pause as long as you want to prepare for the next sentence or section.
- Instead of recording multiple entire-read takes, consider just repeating a section over again if you think it could be done better. This can be easier to edit than recording full-read-through takes.
Tips for editing

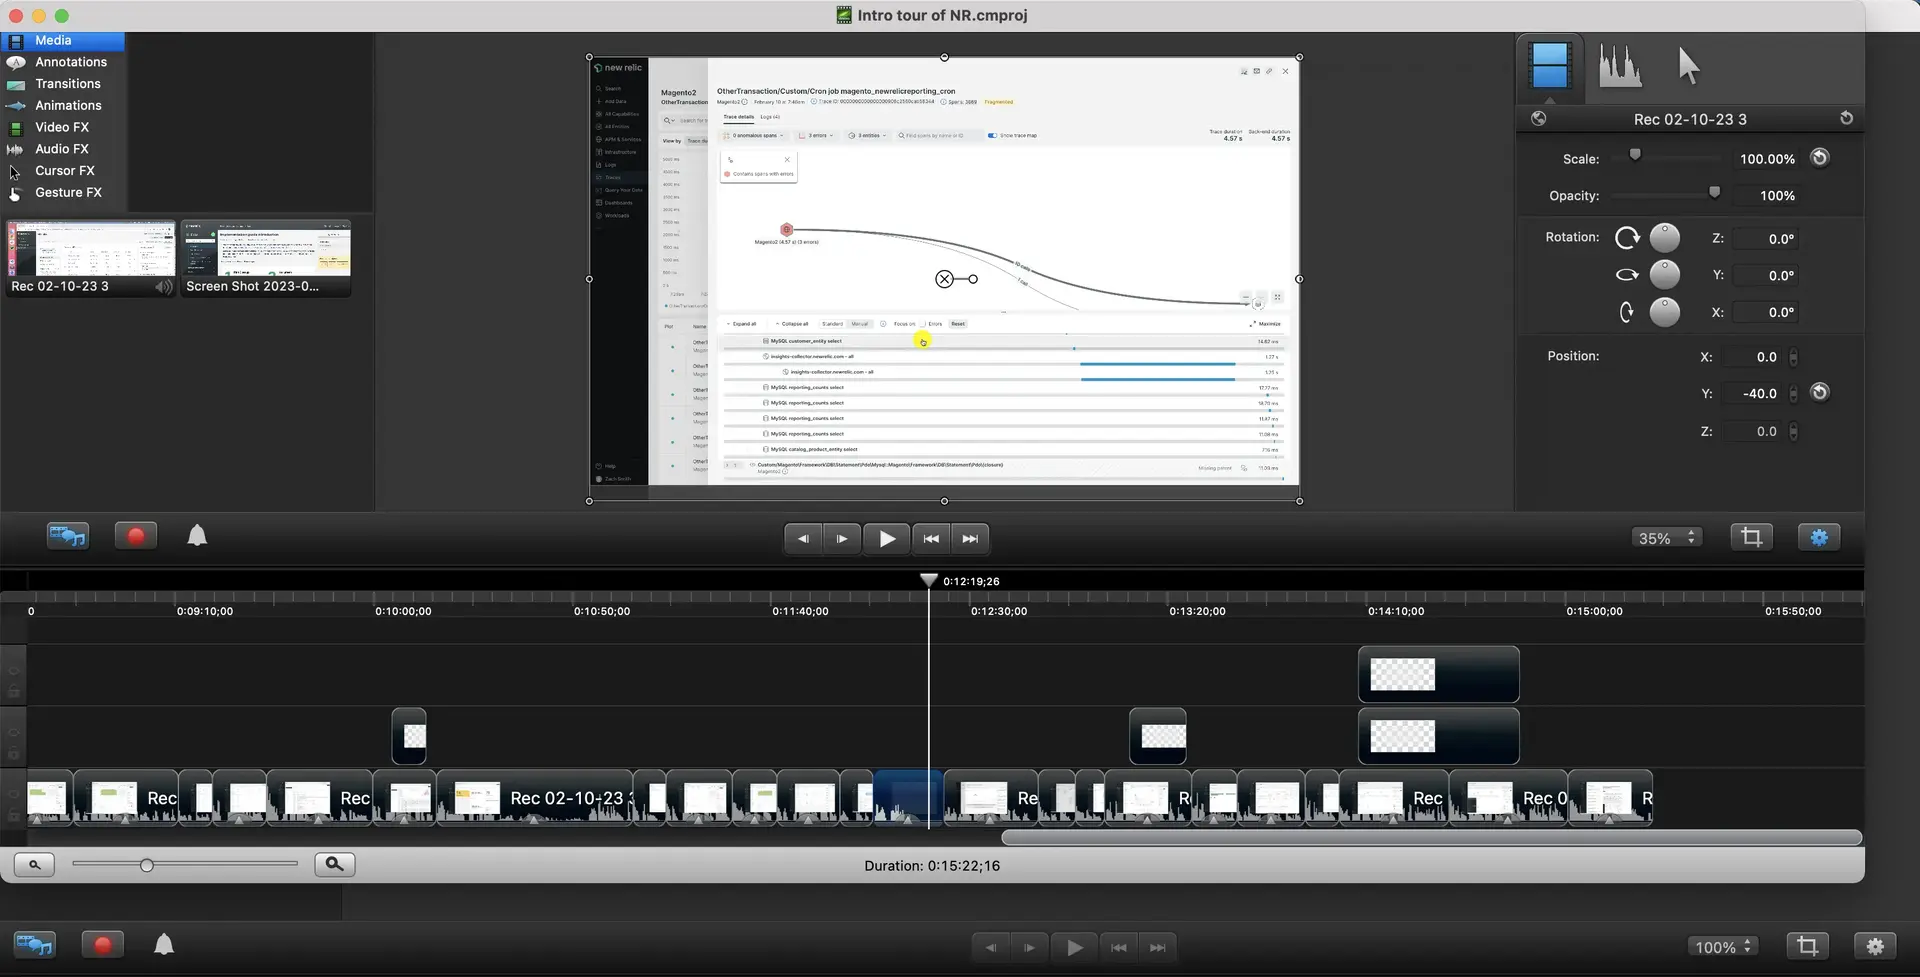
This shows the Camtasia editing interface at the end of video editing. You can see the spliced video clips where pauses were taken out.
Tips for using Camtasia to edit your video:
- Ensure the video in your project is set to 100% scale. To do this, double click on your video on the timeline and then, in the upper right, make sure the scale reads 100%. (For example of this, see the image above.) When this is below 100%, it may export low-resolution video.
- Aim for simplicity: you should rarely have the need to do anything more than splice videos and move clips around.
- To zoom in and out on the timeline, use the magnifying glass interface in the lower left. This can help give you more granular control over editing a clip.
- To highlight your cursor, apply the Add cursor effects setting to your recorded video. For an example of this in use, see the Intro to the platform video.
- To split a video for editing purposes, go to a location on a video clip on the timeline and use Shift+Command+T. (For example, this would be how you split the video to take out a pause.)
- To shorten or lengthen a clip on the timeline, click and drag the end of a clip and move it to the right or left.
- When you're ready to export the video, go to Share > Advanced export and export it as an mp4.
Applying blur

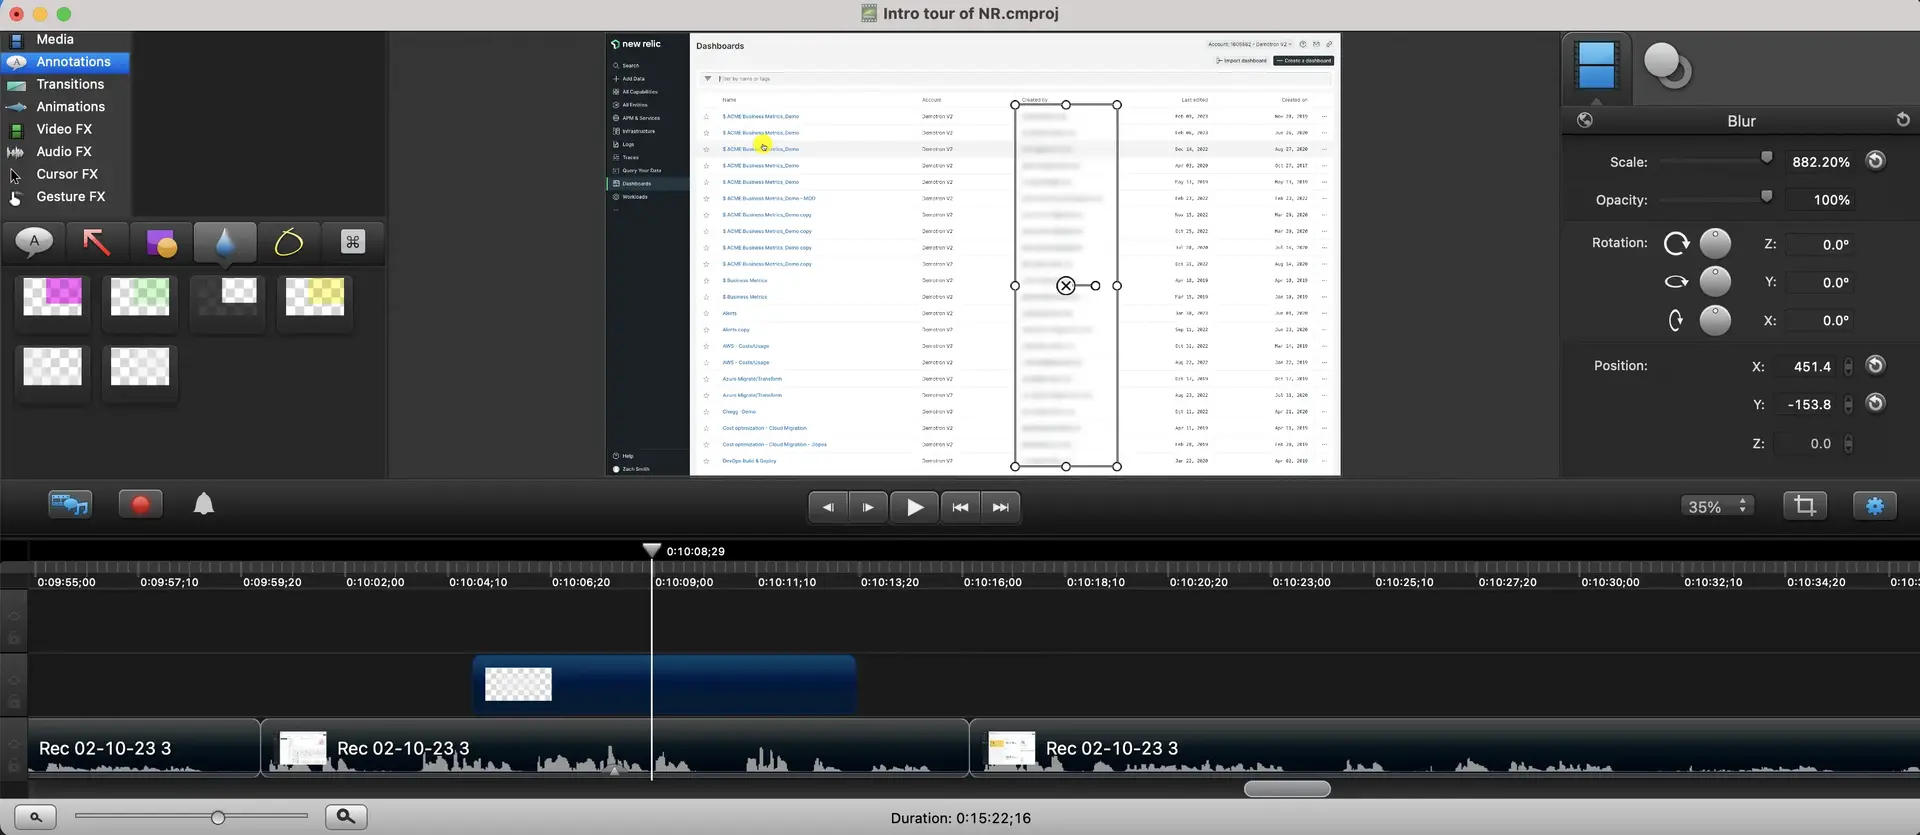
This shows a blur effect applied on a clip. Note that you can see how it is trimmed in size, and in time, to cover the relevant section of the video.
Use the blur feature to blur sensitive information. In Camtasia, you can find the blur effect in the Annotations section (see image below). You can drag the blur effect onto the timeline.
After putting a blur effect on a clip, you can size the blur rectangle to the correct size, and you can move its start and end point to the desired location.
Other tips
For longer videos, consider adding some timestamps to specific sections below the video.
For tips on uploading your video to Wistia and on embedding videos, see Embed videos.