NVIDIA Triton 통합은 업무 환경에서 AI 모델의 배포 및 관리를 모니터링합니다. Triton은 GPU 및 CPU를 포함한 다양한 하드웨어 플랫폼에 걸쳐 구현, 배포, 딥 러닝 모델을 위한 유연하고 확장 가능한 솔루션을 제공하여 조직이 효율적으로 구현하고 배포하도록 AI를 구현합니다.

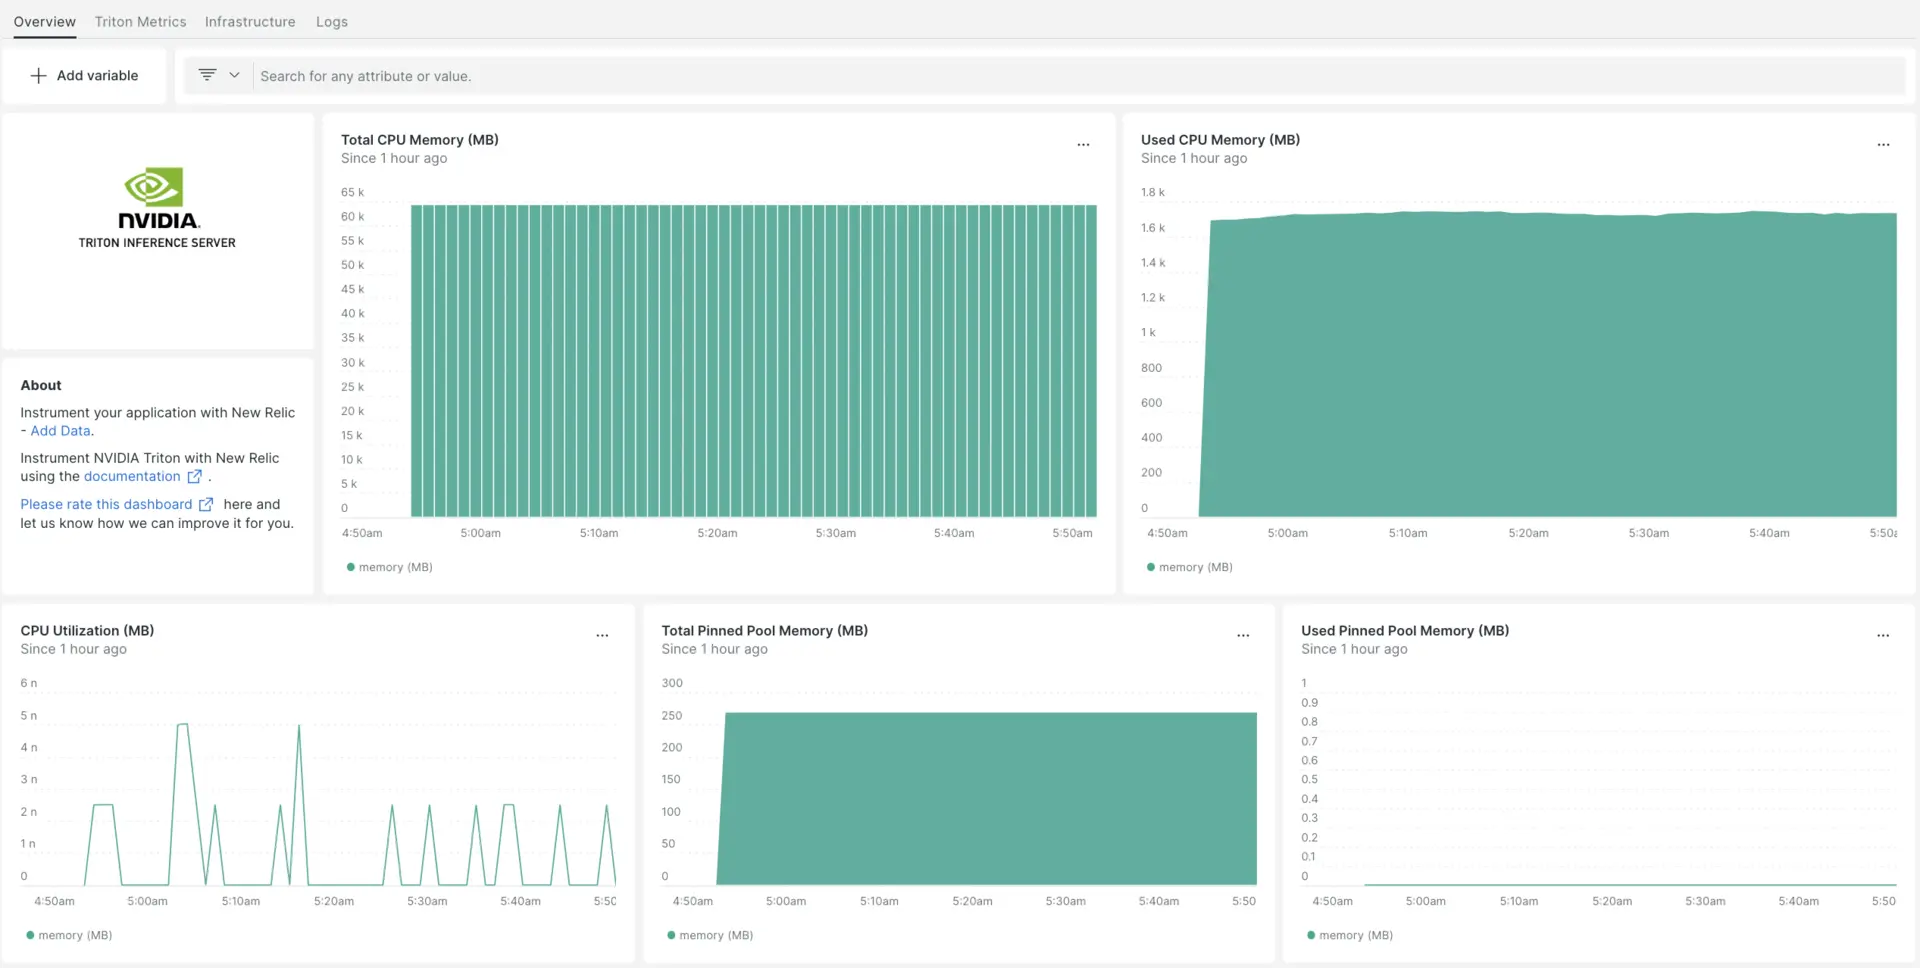
NVIDIA Triton 통합을 설정한 후 NVIDIA Triton 메트릭에 대한 대시보드를 제공합니다.
인프라 에이전트 설치
NVIDIA Triton 통합을 사용하려면 동일한 호스트에 인프라 에이전트도 설치 해야 합니다. 클라이언트 에이전트는 호스트 자체를 모니터링하는 반면, 다음 단계에서 설치하게 될 통합은 NVIDIA Triton 관련 데이터로 모니터링을 확장합니다.
NVIDIA Triton 통합을 활성화합니다. nri-prometheus
Triton 서버 지표는 URL http://localhost:8002/metrics 에 표시됩니다.
팁
Triton 서버 지표 수집에 대한 자세한 내용은 NVIDIA 설명서를 참조하세요.
NVIDIA Triton 통합을 설정하려면 다음 단계를 따르세요.
다음 명령을 실행하여 통합 디렉터리에
nri-prometheus-config.yml이라는 파일을 만듭니다.bash$touch /etc/newrelic-infra/integrations.d/nri-prometheus-config.yml에이전트가 NVIDIA Triton 데이터를 캡처할 수 있도록 하려면 다음 스니펫을
nri-prometheus-config.yml파일에 추가하세요.integrations:- name: nri-prometheusconfig:# When standalone is set to false nri-prometheus requires an infrastructure agent to work and send data. Defaults to truestandalone: false# When running with infrastructure agent emitters will have to include infra-sdkemitters: infra-sdk# The name of your cluster. It's important to match other New Relic products to relate the data.cluster_name: "YOUR_DESIRED_CLUSTER_NAME"targets:- description: NVIDIA Triton metrics listurls: ["http://localhost:8002/metrics"]# tls_config:# ca_file_path: "/etc/etcd/etcd-client-ca.crt"# cert_file_path: "/etc/etcd/etcd-client.crt"# key_file_path: "/etc/etcd/etcd-client.key"# Whether the integration should run in verbose mode or not. Defaults to falseverbose: false# Whether the integration should run in audit mode or not. Defaults to false.# Audit mode logs the uncompressed data sent to New Relic. Use this to log all data sent.# It does not include verbose mode. This can lead to a high log volume, use with careaudit: false# The HTTP client timeout when fetching data from endpoints. Defaults to 30s.# scrape_timeout: "30s"# Length in time to distribute the scraping from the endpointsscrape_duration: "5s"# Number of worker threads used for scraping targets.# For large clusters with many (>400) endpoints, slowly increase until scrape# time falls between the desired `scrape_duration`.# Increasing this value too much will result in huge memory consumption if too# many metrics are being scraped.# Default: 4# worker_threads: 4# Whether the integration should skip TLS verification or not. Defaults to falseinsecure_skip_verify: truetimeout: 10s
NVIDIA Triton 로그인 설정
NVIDIA Triton 로그를 구성하려면 아래 설명된 단계를 따르세요.
다음 docker 명령을 실행하여 실행 중인 컨테이너의 상태를 확인하세요.
bash$sudo docker psnvidia-triton 컨테이너의 컨테이너 ID를 복사하고 다음 명령을 실행합니다.
bash$sudo docker logs -f <container_id> &> /tmp/triton.log &그런 다음
/tmp/디렉터리에triton.log이라는 로그 파일이 있는지 확인합니다.
NVIDIA Triton 로그를 뉴렐릭으로 전달하는 중
우리의 로그 포워딩을 사용하여 NVIDIA Triton 로그를 뉴롤릭으로 전달할 수 있습니다. Linux 시스템에서는 logging.yml 이라는 로그 파일이 다음 경로에 있어야 합니다.
$cd /etc/newrelic-infra/logging.d/위 경로에서 로그 파일을 찾으면 다음 스크립트를 logging.yml 파일에 포함합니다.
logs: - name: triton.log file: /tmp/triton.log attributes: logtype: triton_logsNew Relic 인프라 에이전트 다시 시작
인프라 에이전트를 다시 시작 하려면 다음 명령을 실행하세요.
$sudo systemctl restart newrelic-infra.service몇 분 안에 NVIDIA Triton 서버가 메트릭을 one.newrelic.com 으로 보냅니다.
데이터 찾기
NVIDIA Triton 서버 지표를 모니터링하려면 NVIDIA Triton 이라는 사전 구축된 대시보드 템플릿을 선택하세요. 사전 구축된 대시보드 템플릿을 사용하려면 다음 단계를 따르세요.
one.newrelic.com > Integrations & Agents 로 이동하여 NVIDIA Triton을 입력합니다.
Dashboards [대시보드] 에서 NVIDIA Triton을 클릭합니다.
열린 팝업 창에서 계정을 변경하려면 Edit [편집을] 클릭하세요.
Setup NVIDIA Triton [NVIDIA Triton 설정을] 클릭하거나 이 데이터 소스를 이미 설정한 경우 Skip this step [이 단계를 건너뛰십시오].
View dashboard [대시보드 보기를] 클릭하고 뉴렐릭에서 NVIDIA Triton 데이터를 확인하세요.
Dashboards UI에서 맞춤형 NVIDIA Triton 대시보드를 찾을 수 있습니다. 자세한 내용은 대시보드 섹션을 참조하세요.
다음은 NVIDIA Triton CPU 메모리를 확인하는 NRQL 쿼리 입니다.
SELECT latest(nv_cpu_memory_total_bytes) / 1e+6 AS 'memory (MB)' FROM Metric
다음은 뭐지?
NRQL 쿼리 작성 및 대시보드 생성에 대해 자세히 알아보려면 다음 문서를 확인하세요.
- 기본 및 고급 쿼리를 생성 하기 위한 쿼리 빌더 소개
- 대시보드를 사용자 지정하고 다양한 작업을 수행하기 위한 대시보드 소개
- 대시보드를 관리하여 대시보드 디스플레이 모드를 조정하거나 대시보드에 더 많은 콘텐츠를 추가하세요.