Apache Druid를 뉴렐릭과 통합하면 Druid 클러스터의 성능을 모니터링, 분석 및 최적화하는 능력이 향상됩니다. Apache Druid 통합은 강력한 모니터링 및 경고 기능을 제공하므로 Druid 기반 분석 플랫폼의 안정성과 효율성을 보장할 수 있습니다.

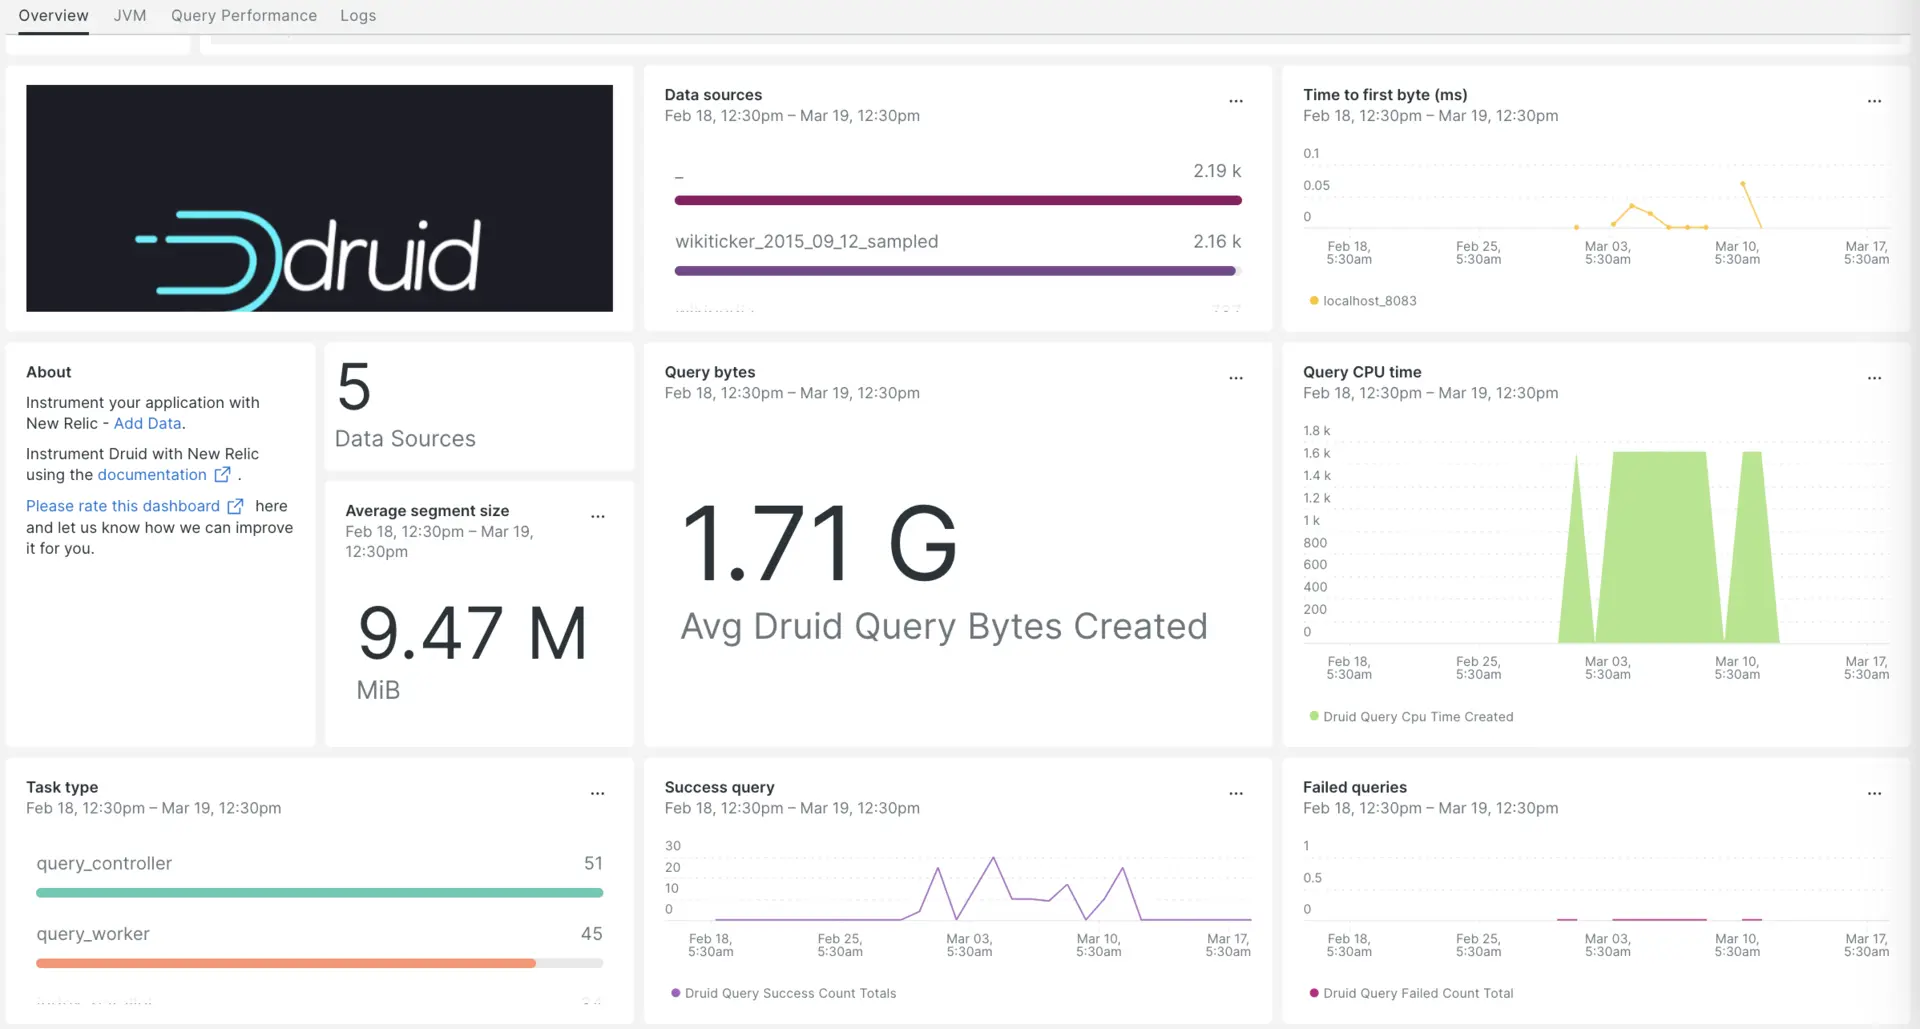
뉴렐릭으로 Apache Druid 통합을 설정한 후, 상자에서 꺼내자마자 대시보드에서 데이터를 확인하세요.
Apache Druid 통합 설정
Apache Druid 통합을 설정하려면 다음 단계를 완료하세요.
인프라 에이전트 설치
Apache Druid 통합을 사용하려면 먼저 동일한 호스트에 인프라 에이전트를 설치 해야 합니다. 클라이언트 에이전트는 호스트 자체를 모니터링하는 반면, Apache Druid 통합은 Druid 클러스터에 특정한 데이터로 모니터링을 확장합니다.
Prometheus Emitter를 사용하여 Druid 지표 노출
apache-druid-$version/conf/druid/single-server/micro-quickstart/_common/common.runtime.properties파일의 확장 프로그램 로드 목록 끝에prometheus.emitter추가합니다.druid.extensions.loadList=["druid-hdfs-storage", "druid-kafka-indexing-service", "druid-datasketches", "druid-multi-stage-query", "prometheus-emitter"]왼쪽 열에 나열된 파일 경로에 오른쪽 열에 나열된 코드 스니펫을 추가하세요.
파일 경로
코드 스니펫
PATH/TO/broker/runtime.properties# Monitoringdruid.monitoring.monitors=["org.apache.druid.java.util.metrics.JvmMonitor"]druid.emitter=prometheusdruid.emitter.logging.logLevel=infodruid.emitter.prometheus.strategy=exporterdruid.emitter.prometheus.port=19091PATH/TO/coordinator-overlord/runtime.properties# Monitoringdruid.monitoring.monitors=["org.apache.druid.java.util.metrics.JvmMonitor"]druid.emitter=prometheusdruid.emitter.logging.logLevel=infodruid.emitter.prometheus.strategy=exporterdruid.emitter.prometheus.port=19092PATH/TO/historical/runtime.properties# Monitoringdruid.monitoring.monitors=["org.apache.druid.java.util.metrics.JvmMonitor"]druid.emitter=prometheusdruid.emitter.logging.logLevel=infodruid.emitter.prometheus.strategy=exporterdruid.emitter.prometheus.port=19093PATH/TO/middleManager/runtime.properties# Monitoringdruid.monitoring.monitors=["org.apache.druid.java.util.metrics.JvmMonitor"]druid.emitter=prometheusdruid.emitter.logging.logLevel=infodruid.emitter.prometheus.strategy=exporterdruid.emitter.prometheus.port=19094PATH/TO/router/runtime.properties# Monitoringdruid.monitoring.monitors=["org.apache.druid.java.util.metrics.JvmMonitor"]druid.emitter=prometheusdruid.emitter.logging.logLevel=infodruid.emitter.prometheus.strategy=exporterdruid.emitter.prometheus.port=19095
Prometheus 이미터 확장 설치
다음 명령을 실행하여 Apache Druid 설정의
extensions폴더 디렉터리 내에prometheus-emitter이라는 폴더를 만듭니다.bash$cd apache-druid-$version/extensions/bash$sudo mkdir prometheus-emitterdruid 다운로드 디렉터리로 이동하고 다음 명령을 실행하여 서버가 시작 시 호출하는 jar 파일을 만듭니다.
bash$sudo java \>-cp "lib/*" \>-Ddruid.extensions.directory="extensions" \>-Ddruid.extensions.hadoopDependenciesDir="hadoop-dependencies" \>org.apache.druid.cli.Main tools pull-deps \>--no-default-hadoop \>-c "org.apache.druid.extensions.contrib:prometheus-emitter:24.0.0"
Apache Druid에 대해 nri-prometheus 구성
nri-prometheus-config.yml이라는 파일을 만듭니다.bash$touch /etc/newrelic-infra/integrations.d/nri-prometheus-config.ymlApache Druid 데이터 캡처를 활성화하려면
nri-prometheus-config.yml파일에 다음 스니펫을 추가하세요.integrations:- name: nri-prometheusconfig:# When standalone is set to false nri-prometheus requires an infrastructure agent to work and send data. Defaults to truestandalone: false# When running with infrastructure agent emitters will have to include infra-sdkemitters: infra-sdk# The name of your cluster. It's important to match other New Relic products to relate the data.cluster_name: "Apache-druid"targets:- description: Secure etcd exampleurls: ["http://<YOUR_HOST_IP>:19091/metrics","http://<YOUR_HOST_IP>:19092/metrics", "http://<YOUR_HOST_IP>:19093/metrics","http://<YOUR_HOST_IP>:19094/metrics","http://<YOUR_HOST_IP>:19095/metrics"]# tls_config:# ca_file_path: "/etc/etcd/etcd-client-ca.crt"# cert_file_path: "/etc/etcd/etcd-client.crt"# key_file_path: "/etc/etcd/etcd-client.key"# Whether the integration should run in verbose mode or not. Defaults to false.verbose: false# Whether the integration should run in audit mode or not. Defaults to false.# Audit mode logs the uncompressed data sent to New Relic. Use this to log all data sent.# It does not include verbose mode. This can lead to a high log volume, use with care.audit: false# The HTTP client timeout when fetching data from endpoints. Defaults to "5s" if it is not set.# This timeout in seconds is passed as well as a X-Prometheus-Scrape-Timeout-Seconds header to the exporters# scrape_timeout: "5s"# Length in time to distribute the scraping from the endpoints. Default to "30s" if it is not set.scrape_duration: "5s"# Number of worker threads used for scraping targets.# For large clusters with many (>400) endpoints, slowly increase until scrape# time falls between the desired `scrape_duration`.# Increasing this value too much will result in huge memory consumption if too# many metrics are being scraped.# Default: 4# worker_threads: 4# Whether the integration should skip TLS verification or not. Defaults to false.insecure_skip_verify: falsetimeout: 10s
Druid 로그를 뉴렐릭으로 전달
다음 경로에 있는
logging.yml이라는 로그 파일을 편집합니다.bash$cd /etc/newrelic-infra/logging.dlogging.yml파일에 다음 스니펫을 추가합니다.- name: druid-logsfile: /home/<Druid-Download Directory>/log/*.logattributes:logtype: apache-druid
인프라 에이전트 다시 시작
인프라 에이전트 문서 의 지침을 사용하여 인프라 에이전트를 다시 시작하세요. 이것은 대부분의 사람들에게 작동하는 기본 명령입니다.
$sudo systemctl restart newrelic-infra.service뉴켈릭에서 드루이드 지표를 확인하세요.
위의 설정을 완료하면 사전 제작된 대시보드 템플릿을 사용하여 지표를 볼 수 있습니다. 이 대시보드에 액세스하려면:
one.newrelic.com > + Add data으로 이동.
Dashboards [대시보드] 탭을 클릭합니다.
검색 상자에
Apache druid입력합니다.이를 선택하고 Install [설치를] 클릭합니다.
Apache Druid 퀵스타트를 추가하고 인덱스 및 알림을 보려면
Install now버튼을 클릭하여 Apache Druid 퀵스타트 페이지를 팔로우할 수도 있습니다.다음은 평균 Druid 세그먼트 크기를 확인하는 쿼리 예시입니다:
SELECT average(druid_segment_size) AS 'MiB' FROM Metric SINCE 30 MINUTES AGO
다음은 뭐지?
NRQL 쿼리 작성 및 대시보드 생성에 대해 자세히 알아보려면 다음 문서를 확인하세요.
기본 및 고급 쿼리를 생성 하기 위한 쿼리 빌더 소개
디스플레이 모드를 조정하거나 대시보드에 더 많은 콘텐츠를 추가하세요.